|
|

I just moved the web site to a new server.
If you have any problems with pages or downloads,
let me know, Fly safe, Waiter
Feb 2005: Sumps and Panels


Those Kindergarten skills are paying off Big Time.
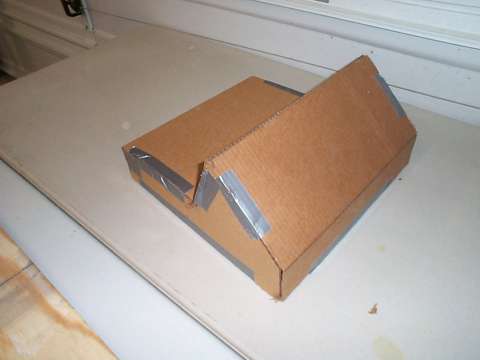
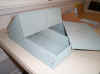
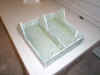
1) Cardboard mockup of the new LongEZ Sump Tank
2) Pieces cut out of 3/8 inch foam.
3) First shot a Vacuum Bagging, This was not really "Vacuum Bagging" but a method described by the
Cozy Girrrls as "LowVac". Significantly lower cost, and does what I
need to do, light and good looking parts. (Thanks Girls)
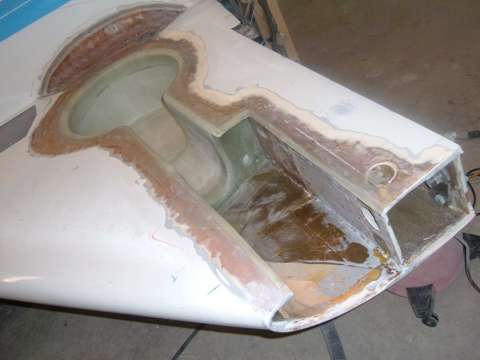
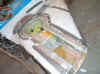
4) The finished parts are now
assembled and glassed inside.
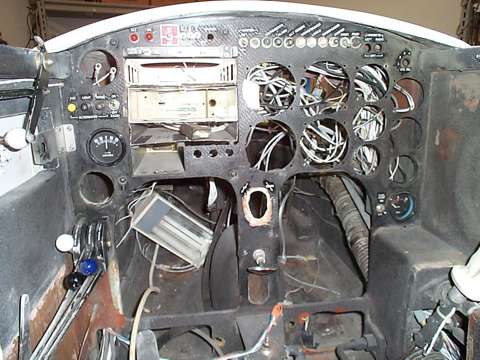
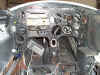
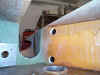
5) The Firewall is fairly cleaned
up, The terminal boards on the left need to get moved. After years of just
adding stuff in the available space, this will be a shot at putting stuff back
on the firewall in an orderly fashion. First Priority is cooling. Notice the
hole in the bottom were the NACA scoop used to be! All of this area gets
re-glassed, then a new steel firewall sheet is to be installed.
6) Removed unused instruments,
removed nose gear crank, Most of the steam gauges are being replaced by
electronic.
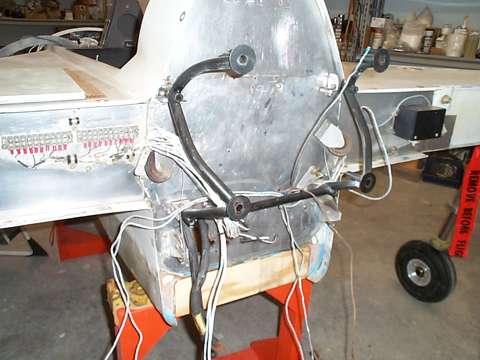
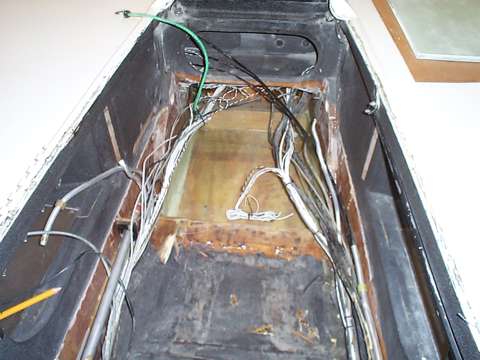
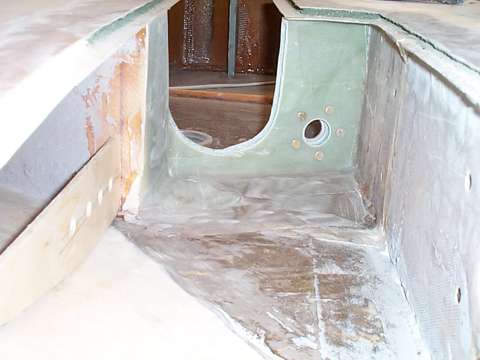
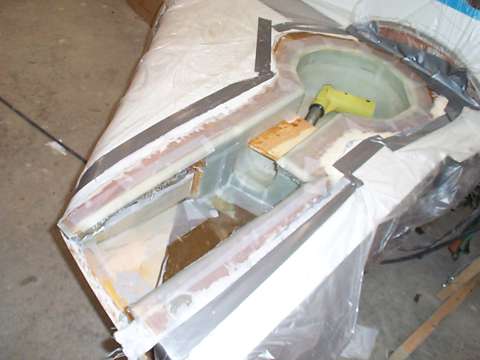
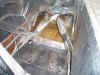
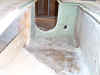
7) This is the New Hell Hole. All
glassed in and ready. The arae once taken up by the NACA scoop has been
reclaimed, and will now be used for my Fuel Sump. The Sump (photo4) fits in
here, along with the hydraulic pump and a couple main gear relays and
solenoids. Same situation as the firewall. Years of just putting add on stuff
in a place that fits. The hell hole will now be cleaned up, and up to date.
8) WAITERS WEB CAM - Although This
is the kind of stuff I enjoy doing, I'm trying to stay focused on getting my
plane flying again. So I have to refrain from getting caught up in software,
and try and get the hardware out the door. At any rate, I updated the NetToWeb
Software that I wrote, to support the addition of the "Update Time"
and also "Update Text" on the web site. I am also now
recording the "uploaded" images. These will be nice for
archiving. This software looks like it might be nice to make
available to others. I'll see if I can put something together this week.
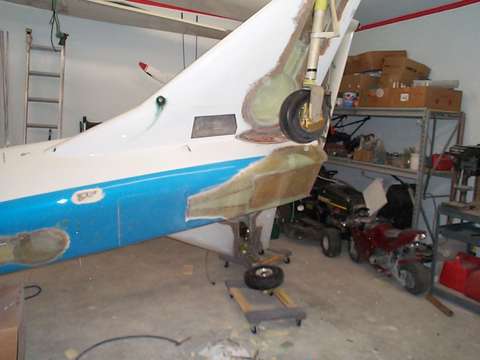
20 Feb 2005: Nose and Tail

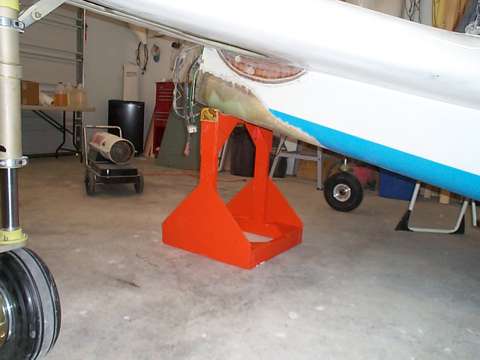
There was recent talk on how to
jack up a LongEZ. My EZ will jack itself up, no need to break my back.
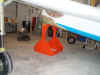
1) With the LongEZ parked on its nose, Slide the rear support under the fuselage.
2) Raise the nose, and it lifts the rear landing gear off the ground.
NOT SHOWN. I have a wedge I put
under the nose tire, When I extend the nose, it rides up on the wedge and then
I slide the forward support under the fuselage.
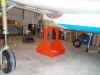
3) I retract the nose and the
fuselage settles down onto the forward support.All three tires are off
the ground.
4) I installed new bearing
supports for the nose gear. Also installed the replacement spacer for the new
NG-6. I lost the original in a snow bank between the house and the shop. Jack was kind enough to mail me a new one (
EZNose Lift).
The nose gear is now complete,
there is absolutely no play in it at all.
5) The big job this weekend was
cleaning out the Hell Hole. All the wires, tubes etc were bundled up and the
floor of the New Hell hole was prepped and glassed.
The New Hell hole will contain my
sump tanks, (no more blisters), and the main gear hydraulic pump and
switches.Hopefully, I'll start building that stuff this week.
19 Feb 2005:WEB SITE Day
Time to do some maintenance on the
site. Notice I've added a live feed from my workshop. This has
been an interesting project (I can see I need to write an article about
this). Basically, I wrote a program that will take snapshots from my
Network Cam, look at it to see if there is movement, create a thumbnail, then
upload it to my web site. I still have a couple bugs, but it looks like its
been working most of the week, and I haven't clobbered my network or
bandwidth.
I split the main page (this page),
it was getting to large. I will split it into months in order to keep browser
upload times to a minimum. I've added links at the top and bottom of the pages
to help you navigate, and also on the left to go directly to the page you
want. (High speed really spoils you)
PHOTOS ARE NOW SMALLER -I re-sampled all the
photos to get them to a more respectable size. If you find a photo that is
still large, let me know and I'll resample it. I apologize for wasting your
bandwidth. I'll be more careful in the future. If you would like a High
Resolution copy of any of the photos, email me and I'll send it to
you.
Oh yah, If your interested in
setting up a web site, Please consider Ace-Host as your host, its about a good
of a deal you'll get, and if you use the hyperlink on the left, It helps me
pay my web site bills. (PLUG FOR ACENET, NUF SAID)
OK, Back to work on the plane!!!
13 Feb 2005:Busy Weekend
This has been a very productive
weekend, Five major tasks completed, The LongEZ is back on its gear, Aircraft
Cradles built, Gear simulator completed, Manometer completed and article
submitted, Resampled all the JPGs on the site.
I apologize to all those that have
limited bandwidth. The Photos I've been posting were approximately 250kb I resampled
all of them and most are around 25kb. This should speed things up considerable.
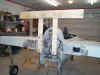
1) Rolling the LongEZ back on its gear.
5 minute job.
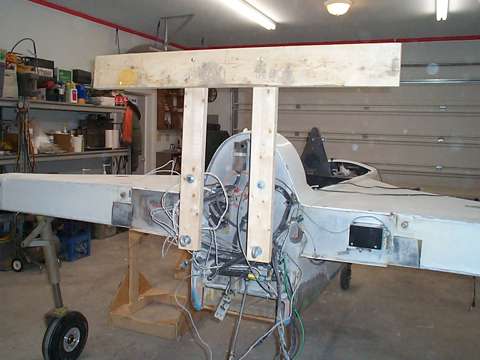
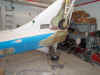
2) 961EZ is on its new gear.
Still a lot of work to do, install hydraulics, install fuel sumps, etc.
Note the two cradles. I built these
to put under the plane during gear testing, but they will also be used for
ongoing maintenance. The plane can actually lift itself onto these cradles by
lowering the nose gear, then putting the cradle under the aft fuselage.
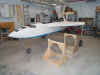
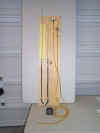
3) This is the stand I use to
support the plane when its upside down. Two each 2x4s and a 2x6, bolted together, and attach to
the engine mount. Very stable.
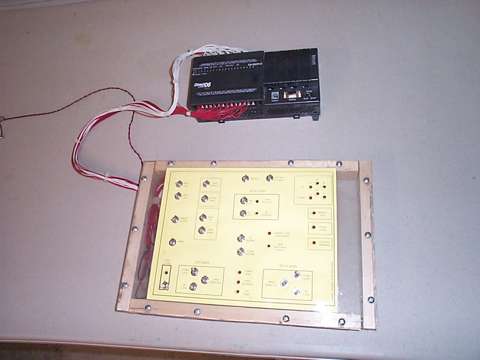
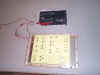
4) This is the new gear computer
(black box) and the aircraft simulator. I use the simulator while writing the
program for the computer. The simulator will also be used for testing /
troubleshooting problems with the gear. To give you an idea of the physical
dimensions, the yellow card is actually an 8 -1/2 x 11 sheet of yellow card
stock that's taped to a piece of Lexan. This controller will take the place of
the original Infinity Aerospace controller, and the original nose lift
controller. Both the Infinity Aerospace, and the EZNose Lift are now integrated
into one controller and switch.
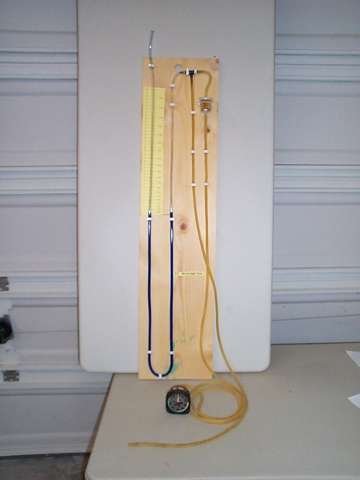
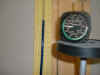
5 & 6) I finished the Manometer,
and submitted the article to EAA. Also checked a couple airspeed
indicators I had laying around. I'll be using the Dynon EFIS as my main flight
instrument. Check out the Manometer Article
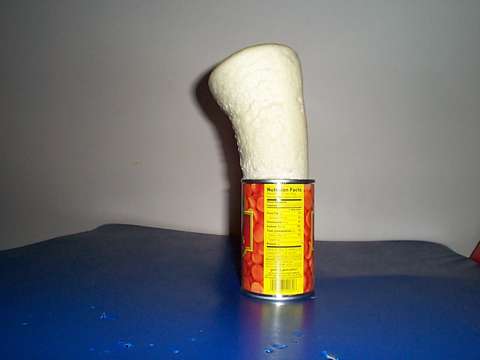
12 Feb 2005:Bottom Closed up, No More NACA Scoop
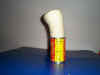

1) For those of you who haven't seen
expanding foam, I was using two of these soup cans to mix in (part A and B).
When I was finished, I had a little left in each can, so I mixed them. The
total combined amount (part A and B) went to the top of the UPC code (about 3/4
inch). You can see what happens in about 5 minutes. Its hard and ready to
work in less than 1 hour. DO NOT use this stuff for structural foam, Its very
brittle and continues to outgas forever.
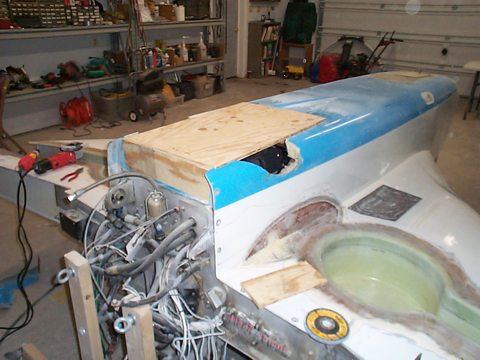
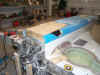
2) There's been a lot of speculation
about what happens to the rear seat if you land this thing on its belly. Will
the bottom glass lay-ups grind away to expose the rear seat? I doubt it, but, I
wanted to not only protect the rear seat occupant, but also the sump tank that
is sitting in the hell hole. Someone made the statement, Why not put a piece of
Oak in the bottom. Lights came on, That's easy. What you see is a
piece of 1/2 inch plywood, The plane should be stopped before it grinds away.
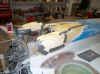
3) Foaming up the holes where the
fixed gear used to be. Also foaming in the old NACA scoop. (I'm converting to
downdraft cooling).
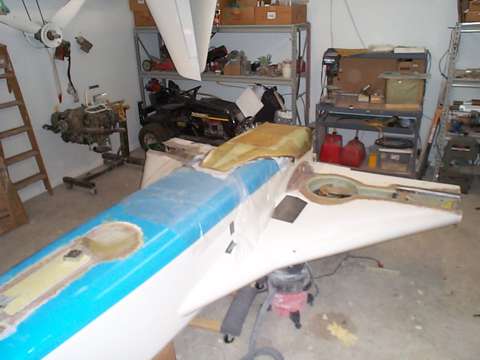
4) Fuselage bottom is glassed in.
Little bit of filler and some paint, and we're ready! (I wish)
The lay-ups were 2 layers of UNI, full
span, oriented parallel to the wings, There were also two partial UNIs that only
cover the last 6 inches of the fuselage, also oriented parallel to the
wings. Two full span BIDs 45 degrees to the fuselage.
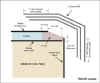
10 Feb 2005:Wheel Well Insert Lay-ups
I pondered over this for several
days, trying to figure out the best way to do this. When you stop and look at
the problem, there really is no other solution. The drawing below is modified
slightly from drawing in the original Infinity Aerospace Installation manual. Basically, I made sure the
insert stuck up a little so I could capture a portion of the outside wall, I
added a little more FLOX, and one layer of BID.
One of the challenges of performing
the retrofit, getting the wheel well insert to become part of the
structure, and just as important, DON'T LEAK.
NEW INSTALL - If this is a new
installation, this is easy, because the wheel well would be installed before the
top skin of the strake is installed. The liner is sealed with a bead of flox all
the way around on the inside.
RETROFIT - Because its a retrofit,
you can't get to the inside to run that bead of flox. All of the seal and
structure must be done from the outside. The drawing above is a slightly
modified version of the Infinity Aerospace instructions.
Using flox as the structural
component, I wanted to make sure I captured the inside of the insert, and the
inside of both the top and bottom strake skins. This would form a structural
bond, and also provide three layers of defense against a fuel leak.<
A forth layer of defense and
additional structural bonding is performed by the 3 layer BID wrap. The
plans call for two, I installed three.
When the entire structure had cured,
I was impressed at the apparent "hardness" of the installation.
If you recall from the video when JD is tapping on the inside of the wheel well,
it almost sounded like a metal component. This one sounds just like that, even
more so.
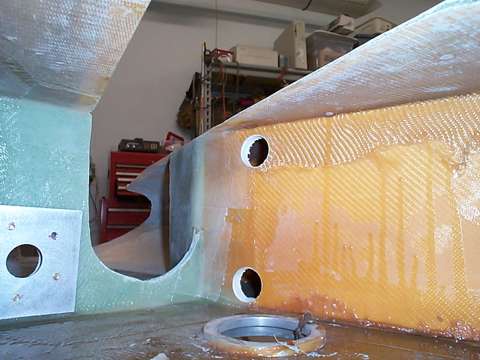
6 Feb 2005:Fuel Tanks Closed
The fuel tanks are again closed. This is a major milestone.


1) Note the small round hole to the
right. This is for a Centroid Fuel Probe. Note also the plywood on the left.
This gets 3 layers of BID on the back, and 4 on the front. This is where the
hydraulic lines will connect. The mounting bracket for the Up-Lock switch
will be glassed in right in front of the "U" cutout.
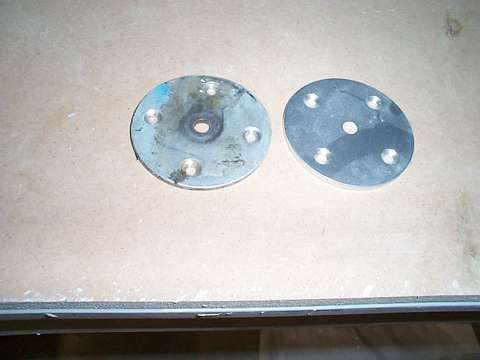
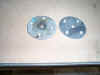
2) The metal plate (on the left) is
the fuel sender mount plate (on the insides of the tank). The two holes
toward the right at the top and bottom, allow fuel to slosh into this new
compartment. Don't forget these, or you may not be able to use all the fuel in
the forward part of the strake, and you won't be able to fill the forward part
of the strake, as there will be a big air bubble trapped.
3 & 4) Both sides are fully laid
up. Note that I used 3 layers of BID all the way around. The piece of
plywood in the strut opening is there to hold the "U" in its correct
position while glassing the insert.
5) Wheel well completed.
For some reason a couple photos I
took didn't turn out. Of particular interest was hooking the vacuum cleaner up
to the inserts to pull epoxy into any voids (as per plans).
Waiters GPS Set Time program.
Waiters Flight Data Recorder.
Flight Data Recorder.
Recording aircraft flight data.
Aircraft Voice recorder.
Garmin GPS.
Garmin GPS Serial data Format.
Recording EFIS data.
Capture Serial data.
Convert Raw Data Files.
Free GPS Software.
Reading GPS data.
Reading Garmin GPS data.
Aircraft EFIS Flight Instruments.
Electronic Flight Instruments.
Aircraft Engine Monitor System.
Garmin G format.
Infinity landing gear LongEZ Plans Built Airplane.
Oil Heat system for Homebuilt airplane.
LongEZ Canard and main Wing.
Dynon instrument panel.
Custom Mouse cursors.
Garmin Serial Data Format.
Easy, Free Computer Time setting by GPS Receiver.
Custom mouse pointers.
Custom airplane mouse pointers.
LongEZ Nose gear doors.
Long-EZ main landing gear doors.
LongEZ grasscutter landing gear door.
Custom LongEZ mouse pointers.
Lycoming engine in LongEZ.
MT Propellor with 6 inch propellor extension.
EZNose Lift retractable nose gear for Long-EZ.
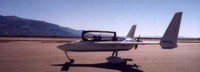
Rutan LongEZ is a plans built aircraft.
High speed homebuilt airplane.
Retractable landing gear for LongEZ.
Custom Airbus mouse cursor pointer.
Custom Velocity mouse cursor pointer.
NMEA 0183 Serial data Format.
Custom Cozy mouse cursor pointer.
Custom Aerocanard airplane mouse cursor pointer.
Custom E-Racer mouse cursor pointer.
Custom Canard airplane mouse cursor pointer.
Custom LongEZ mouse cursor pointer.
Set your Computer clock with this free GPS software.
Custom F15 mouse cursor pointer.
Custom A10 Warthog mouse cursor pointer.
LongEZ Hydraulic pump.
Retractable landing gear for a Long-EZ.
Custom F16 mouse cursor pointer.
Custom F14 mouse cursor pointer.
Custom Boeing 747 mouse cursor pointer.
Custom Boeing 767 mouse cursor pointer.
Custom Boeing 777 mouse cursor pointer.
Custom Boeing 737 mouse cursor pointer.
GPS Time Sync.
Custom Boeing 727 mouse cursor pointer.
Landing gear door rigging.
Custom Boeing 757 mouse cursor pointer.
Custom MD80 mouse cursor pointer.
Custom DC9 mouse cursor pointer.
Setting your computer to a GPS Time.
Custom RV mouse cursor pointer.
Downdraft cooling for LongEZ.
Speed brake installation.
Waiters Flight Data Recorder.
LongEZ Baggage pods installation instructions.
Waiters Custom Airplane mouse cursors.
Free GPS Time Sync Program.
LongEZ Intercom installation.
Major airframe overhaul of plans built EZ.
Weight and balance for a LongEZ.
Weight and Balance spreadsheet download for a Long-EZ.
LongEZ fuel system design.
How To remove the wings from a LongEZ.
How To remove the canard from a LongEZ.
Waiters GPS Time sync program runs on PC.
How To remove the engine from a LongEZ.
Long-EZ Downdraft cooling for a Lycoming O-320.
Long-EZ Wing Removal and installation instructions.
Waiters Retractable Landing Gear Controller.
Landing Light installation in LongEZ.
Install free EFIS software on your PC.
How to Put several longezs in one hangar.
How to install an Infinity Aerospace Retractable landing gear in a Long-EZ.
How to install DownDraft cooling on a Long-EZ.
GPS Time.
Setting you computer clock to GPS time.
How to set your Computer clock to GPS Time.
Using your GPS Receiver to set your computers clock.
Low cost GPS receiver used to syncronize Computer clock to GPS time.
Neat Canopy stay system for an EZ.
Cabin Heat using engine oil as source.
Waiters GPS Time, Syncronize your PCs internal clock with the GPS satellite.
Remote display of EFIS on a PC.
Cabin Oil Heater for a LongEZ.
LongEZ Landing Gear Door.
Rigging a LongEZ Landing Gear door.
Icom Radio in LongEZ.
How to Build a Manometer.
LongEZ Electrical system upgrades.
Grand Rapids EMS.
Custom Windows cursors.
Custom Windows mouse pointers.
LongEZ Cowling for downdraft cooling.
Record holding LongEZ flights.
Using a PLC for a retractable Landing Gear Controller in a LongEZ.
Syncronize your PCs clock to a GPS receiver.
Airspeed vs pressure lookup tables.
How to build a homebuilt airplane.
Video of LongEZ taking off.
Grasscutter landing gear door.
EZ Nose Lift installation.
Landing Gear status indicator.
Shareware software can set your PC clock vie a GPS receiver.
Landing Gear controller computer for LongEZ.
Landing gear doors.
Dynon EMS10 installed in instrument panel of a LongEZ.
Dynon EFIS D10A installed in instrument panel of a LongEZ.
Flight Data Recorder Software.
PlansBuilt LongEZ.
Video of High G turn in a Long EZ.
Strong Pitch Trim system installed in a LongEZ.
Strong Pitch Trim mounted on Left Side of Long-EZ.
Free software sets your PC clock with a GPS receiver.
Video of LongEZ Taking off.
Video of LongEZ Landing.
Video of LongEZ performing a high G turn.
Video of Infinity Landing gear being retracted into a LongEZ.
LongEZ Color White.
Painting your LongEZ.
White LongEZ.
Camoflage LongEZ.
Infinity Landing Gear for LongEZ.
Strong Pitch system.
|